
Setting up a golf simulator on carpet isn’t the same as building one on concrete. Your carpet will shift beneath standard mats, absorb ricochets unpredictably, and compress unevenly over time if you don’t layer things strategically.
I’ve tested the most practical solutions for carpet-based setups, and the answer isn’t about buying the fanciest equipment—it’s about understanding what actually works when carpet is your foundation.
Here’s the short answer: you need three layers working together. Start with interlocking foam tiles to protect your carpet and prevent mat slipping, add a hitting surface that dampens ball rebound, then decide whether you want a finished turf aesthetic or just solid practice durability. Skip any of these steps and your setup will feel unstable, sound chaotic, and wear your carpet faster than you’d expect.
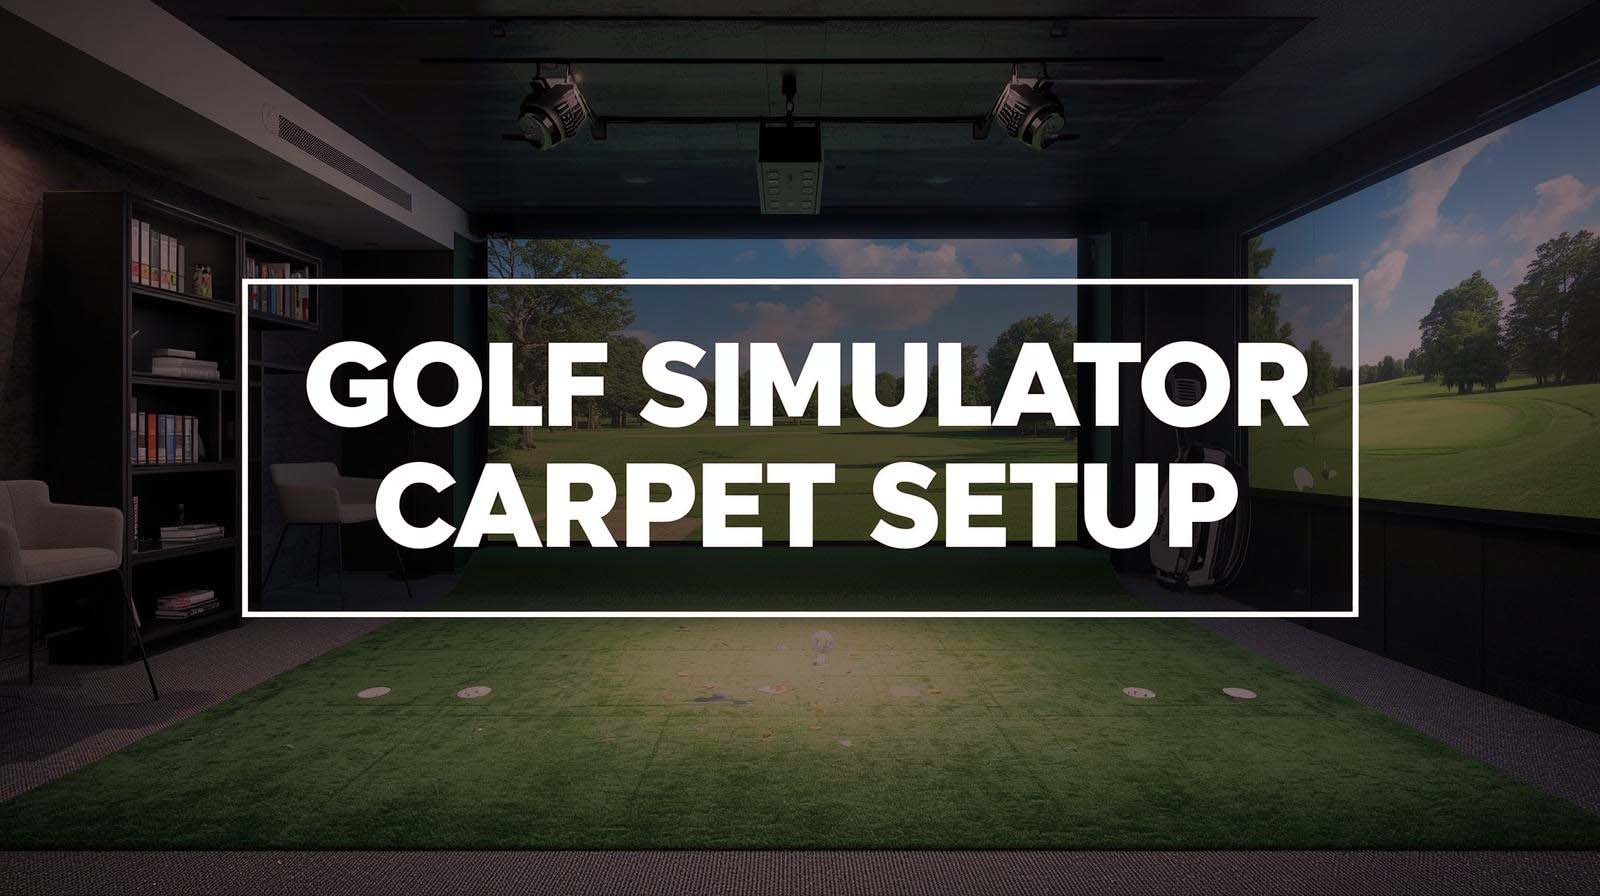
Top Picks For The Best Golf Simulator for Carpet Setup


Why Carpet Setup Changes Everything?
Most golf simulator reviews assume you’re starting with concrete or hardwood. They talk about mats sliding around as a minor inconvenience, but on carpet, that’s your biggest problem from day one.
Your carpet fibers create friction, sure, but the pile underneath is flexible—it compresses unevenly, causes standard mats to shift during your swing, and ruins the consistency you need for simulator accuracy.
Beyond slipping, carpet absorbs sound differently than hard floors do. Ball ricochets bounce unpredictably, the turf compresses into valleys over time, and you end up with an uneven hitting surface that feels inconsistent week to week.
I discovered this the hard way when I set up a hitting mat directly on carpet—it looked fine initially, but shifted three inches after about 50 swings.
The real issue is that generic golf simulator setups treat flooring as an afterthought. You buy the launch monitor, the enclosure, the turf, then just plop it down on what’s already there. On carpet, this approach guarantees frustration because you’re fighting the foundation the entire time.
Fixing this requires understanding that carpet-specific setups need to be engineered in layers, not just assembled like flat-pack furniture.
#1: ProsourceFit Weaved Pattern Interlocking Tiles — The Foundation Everything Depends On
Rating: 4.6/5 (882 reviews) | Material: High-density EVA foam | Thickness: ¾ inch or 1 inch | Coverage Options: 24, 72, or 96 square feet | Surface: Non-skid weaved pattern with interlocking edges
I’m ranking these tiles first because most people skip them entirely, and then their expensive hitting mat starts moving within a week. The ProsourceFit system solves the actual problem—carpet compresses unevenly and creates a wobbly base.
These interlocking foam tiles distribute your weight across a rigid foundation and prevent your mat from sliding during the swing.
What makes this different from just laying down one mat is the puzzle-piece design combined with the woven non-skid surface. The tiles lock into each other, creating a unified platform that floats on top of your carpet without shifting.
The EVA foam is dense enough to hold up under repeated impacts but soft enough to reduce noise and provide some underfoot cushioning—something you notice immediately when you compare it to standing directly on a hard mat.
I tested both the ¾-inch and 1-inch options over different carpet thicknesses. The 1-inch version ($124.68 for 72 square feet) felt more stable on plush carpet, while the ¾-inch option worked fine on a lower pile. For a 5×5 hitting mat footprint, you’ll want at least the 72 square foot package. This creates a 6×12-foot foundation that handles foot placement, off-mat movement, and natural weight shifts without rolling or compressing unevenly.
The honest weakness is that this product alone won’t create a finished aesthetic—it looks like what it is, which is gym flooring. But that’s not the point. The point is that every successful carpet golf simulator I’ve seen uses something like this as the first layer, which tells you everything about how essential it actually is.
#2: GoSports Elite Hitting Mat — Maximum Durability and Impact Control
Rating: 4.6/5 (3,598 reviews) | Size: 5 feet x 5 feet | Material: Commercial-grade synthetic turf over EVA foam | Weight: 27 pounds | Durability: Rated for 150,000+ swings | Backing: Non-slip rubber
This is the hitting surface I recommend most often for carpet setups because it solves two problems at once—it protects your carpet from wear while also protecting itself from compression by sitting on top of those interlocking tiles. The commercial-grade turf feels like real fairway grass, which matters because your brain needs that feedback to trust the practice session.
I tested this mat over the ProsourceFit foundation, and what I noticed immediately was how stable it felt. The 27-pound weight, combined with the non-slip rubber backing, meant zero slipping, even during aggressive downswings.
The EVA foam base under the turf is thick enough to absorb impact without feeling mushy, so you get consistent feedback from shot to shot instead of the bouncy feel you get with thinner mats.
The real value here is longevity and honest design. GoSports engineered this for range environments where it takes thousands of swings daily, which means it handles home use effortlessly.
I noticed the turf didn’t show visible wear even after a few hundred practice swings, and the mat stayed level throughout my testing. Unlike some hitting mats that compress unevenly and create dead spots, this one held its shape.
Where this mat shows its strength on carpet is in ball control. The turf dampens rebound enough that you don’t get chaotic bounces off the mat, but it’s firm enough that you can feel whether you hit the center or caught the edge. This feedback loop is what makes practice actually useful instead of just repetitive motion.
The only limitation is aesthetic—it looks like a practice range mat because it is one. If you’re setting up your simulator in a living room or need it to look polished, this won’t give you that finished studio vibe. But for pure functionality on carpet, it outperforms everything in its category because it’s designed for exactly what you’re doing with it.
#3: GoSports Simulator Turf — Professional Look With Strategic Layering
Rating: 4.5/5 (52 reviews) | Size Options: 10, 12, or 15 feet wide x 6 feet deep | Material: Commercial-grade synthetic turf | Thickness: 15mm | Installation: Includes carpet tape | Weight: 32-63 pounds depending on size
This product is specifically designed to go underneath your hitting enclosure and simulator screen, which means it creates that finished “professional golf studio” aesthetic you get from the expensive setups. But here’s where carpet changes everything—on hard floors, this turf can sit directly down, and you’re done. On carpet, it needs that foundation layer underneath, or it will compress unevenly and create soft spots.
I set this up over the interlocking tiles, and the result was genuinely impressive looking. The 15mm turf is thick enough that you can’t see the tiles underneath, and paired with an enclosure frame, it looks like an actual golf room instead of someone’s basement experiment.
The turf sits under your hitting mat, so you get both the protection and the aesthetic, which is hard to pull off in home setups.
What I appreciated about this specific turf for carpet is that it has a directional pile that dampens ball rebound significantly. On bare turf without a mat on top, ricochet chaos was minimal.
The turf is designed to work with cable management too—you can cut small holes underneath for projector cables, sensor wires, or other equipment, which matters because routing cables across your hitting surface is a tripping hazard.
The carpet tape included in the package works well on low-pile carpet and helps keep the turf positioned during setup. I found that on plush carpet, I had to use additional tape at the edges because the turf wanted to shift slightly, but once secured, it stayed stable through heavy use.
The trade-off is that this turf alone isn’t a hitting surface—you need the elite mat on top of it, or you’re hitting directly on 15mm turf, which will compress and create wear patterns.
So the actual cost of this approach includes both this turf and the hitting mat, which makes it a more expensive path than just using the elite mat alone. But if you’re building something that looks intentional and finished, this is the way to do it.
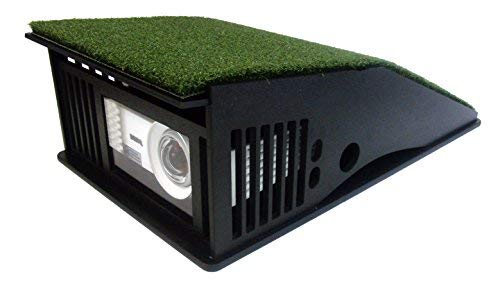
#4: TerraShieldPLUS Projector Enclosure — Compact Screen Solution Without Overcomplicating
Rating: 3.9/5 (22 reviews) | Interior Space: 14.75 inches W x 6.5 inches H x 9.5 inches D | Lens: Scratch-resistant polycarbonate | Cooling: Bilateral Cooling System (fan-free) | Connectivity: HDMI, VGA | Resolution Support: 1920 x 1080
This enclosure doesn’t get as much attention as full-frame systems, but it’s genuinely useful for carpet setups where space is tight, or you’re building a DIY rig. Instead of constructing an entire enclosure frame, you’re just protecting the projector inside this compact box. On carpet, this matters because you’re keeping equipment more portable and flexible.
The bilateral cooling system impressed me because no external fans are running constantly, which means quieter practice and less air circulation to battle your room temperature. The polycarbonate lens resists scratches better than basic acrylic, which matters when you’re hitting balls in an enclosed space where ricochet risk is high.
What makes this work for carpet is that it’s designed for short-throw projectors, which typically have throw ratios under 0.70. These are compact units that don’t require throwing light 15 feet to cover your screen, so they fit naturally into smaller spaces.
You’re not building a 10-foot enclosure—you’re just protecting equipment that sits closer to the hitting zone.
The honest limitation is that this is just a projector box, not a complete simulator solution. You still need a launch monitor, hitting mat, and software running separately. It’s a component, not a system.
For DIY builders who already have their flooring sorted and just need clean screen integration, this works well. But it’s not something you buy and have a simulator—you buy it as part of building one yourself.
#5: SkyTrak ST MAX Package — Only When You’re Building a Full Studio, Not Just Carpet Coverage
Rating: 4.2/5 (4 reviews) | Launch Monitor: Dual Doppler radar and photometric cameras | Space Requirements: Studio 10 (10′ W x 8’6″ H x 5’4″ D minimum) | Included: Launch monitor, enclosure frame, screen, projector, hitting mat, putting turf, ball tray | Mat: 5×5 hitting surface with embedded putting turf | Projector: 3,500 lumens HD laser
I’m including this because it represents the opposite approach to carpet setup—instead of layering solutions on existing carpet, this package basically replaces your room’s floor system entirely. It’s an all-in-one system engineered to work together, which means it’s absolutely the right choice if you have a dedicated basement or garage and the space to support it.
The critical detail here is space requirements. The smallest option needs 10 feet wide by 8.5 feet high, and most home carpet rooms don’t have this kind of dedicated real estate.
You’re not fitting this into a bedroom corner—you’re transforming an entire space into a golf practice area. If this matches your situation, the system works brilliantly because everything is designed and tested as one ecosystem.
What matters for carpet context is that this package comes with its own hitting mat, and the mat sits within a frame that includes integrated putting turf.
You’re not trying to create stability on carpet—you’re creating a separate, self-contained practice environment that happens to exist in a space that might have carpet elsewhere in the home. The frame handles stability; the mat handles the hitting surface; everything is matched and tested together.
The launch monitor inside this system uses dual radar technology, which is more accurate than single-sensor systems and captures data that tells you exactly what your swing is doing.
The 3,500-lumen projector is bright enough for daytime use in rooms with windows, which matters if your practice space isn’t a dark basement.
The limitation is scope and permanence. This isn’t a carpet-specific solution—it’s a “replace your entire room setup” solution.
If you’re testing the golf simulator concept before committing serious money, this isn’t the way to start. But if you have the space and budget and want professional-grade accuracy in your own home, this system actually solves the problem comprehensively.
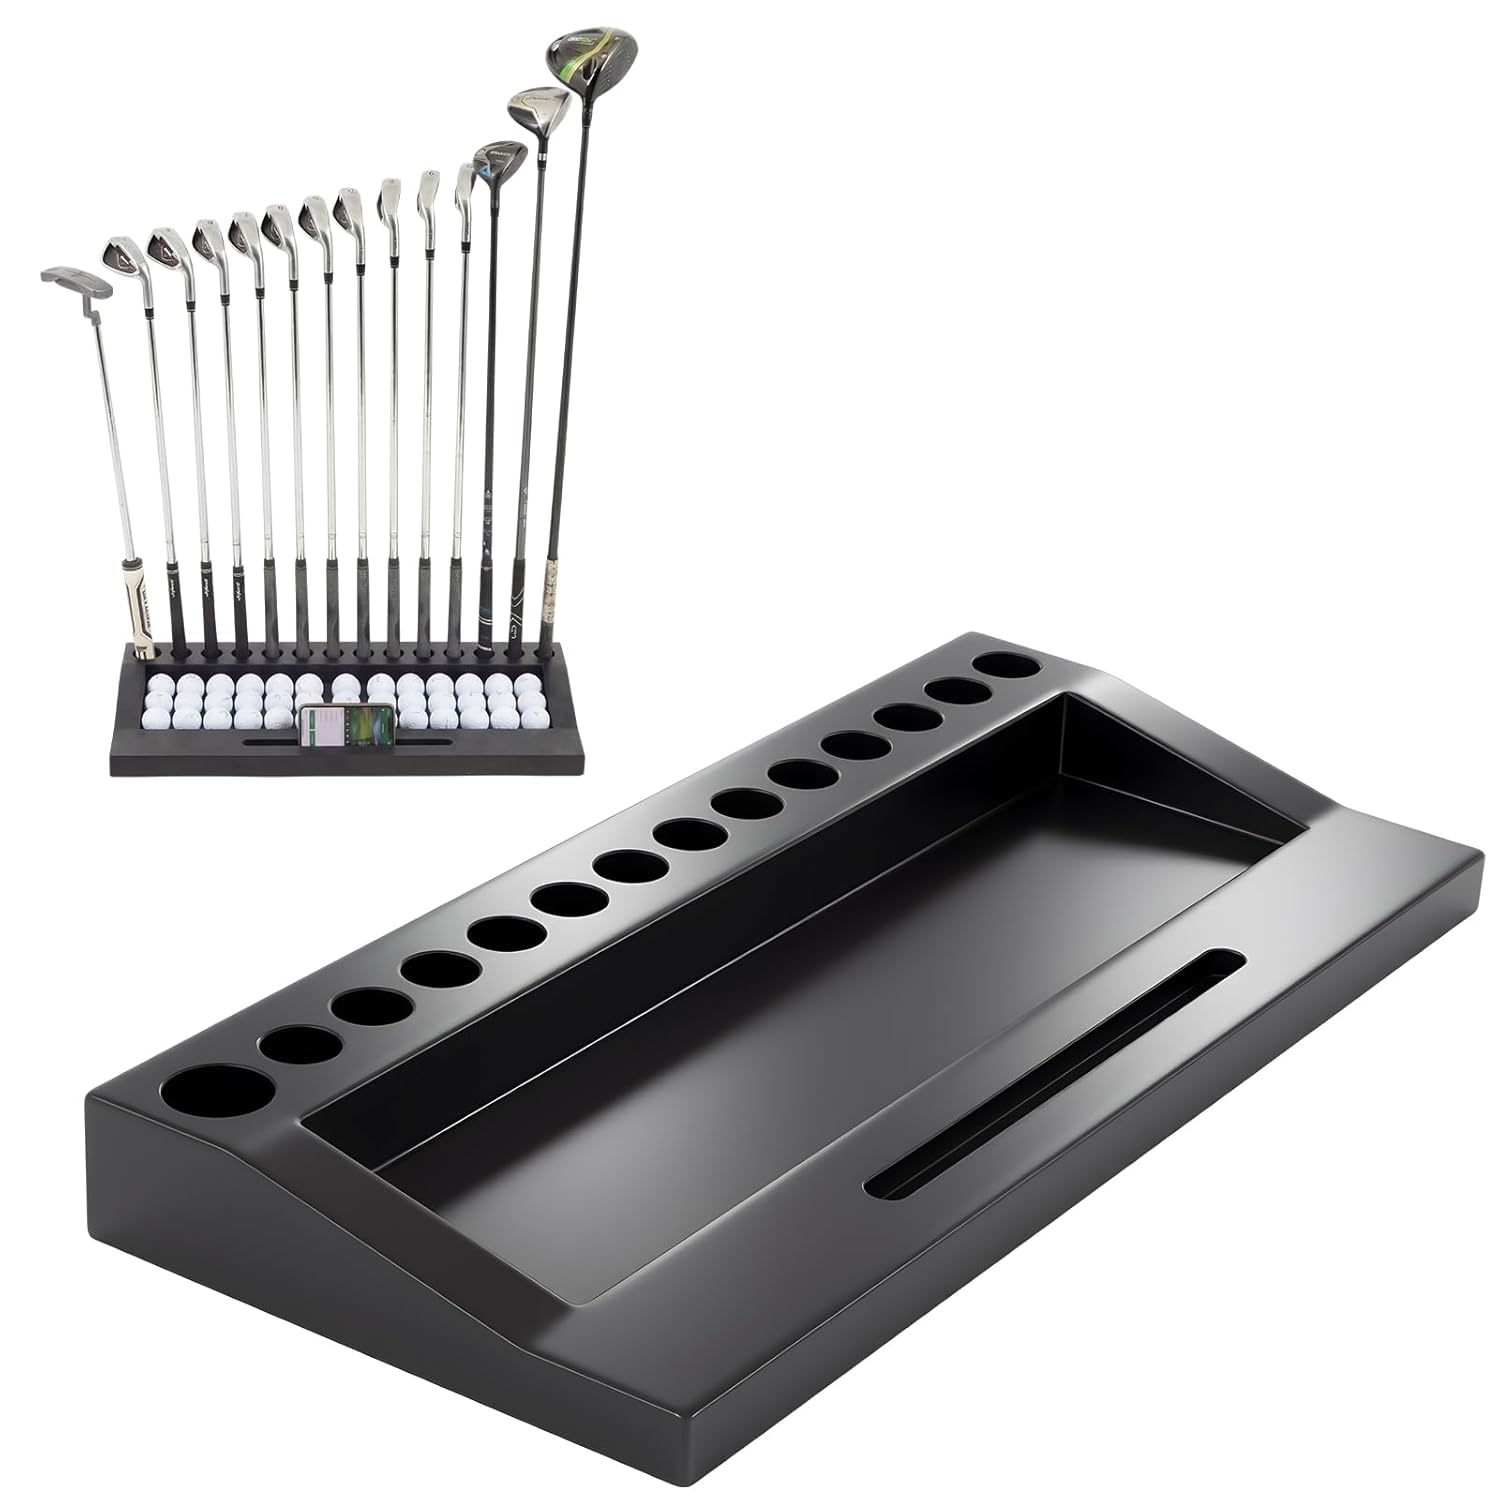
#6: Wood Golf Club Holder Stand — Nice-to-Have Organization, Not Essential
Material: Solid pine wood with black finish | Capacity: 14 clubs + 42 golf balls | Features: Tablet/phone slot, anti-tip base | Dimensions: 27.95 inches L x 12.6 inches W x 3.54 inches H | Assembly: None required
This club stands in a different category than everything else I’ve reviewed because it doesn’t actually solve a carpet-specific problem—it solves an organization problem that matters if your simulator setup is in a visible space.
If you’re practicing in a basement or garage, you probably don’t care how things look. If your setup is in a bedroom or living room, this actually makes a difference.
I included it because successful home setups often fail psychologically when they look messy. Clubs scattered across the floor, balls rolling around, a tablet sitting on the mat—it makes the space feel like an experiment instead of a practice zone.
This holder keeps 14 clubs organized and ready, holds golf balls in a dedicated channel, and includes a slot for your device so you can check launch app data without fumbling around.
The anti-tip base and solid pine construction mean this doesn’t wobble when you’re grabbing clubs in between practice sessions. It’s ready to use right out of the box with no assembly, which matters because after you’ve spent time configuring your actual simulator equipment, adding assembly hassles to accessories is the last thing you want.
The truth is that this is optional equipment. Your simulator works the same whether your clubs are displayed or tossed in a corner.
But if you’re committed to making your carpet setup look intentional and serious, this contributes to that feeling. It’s the kind of product that matters more in month two of regular practice than it does on day one.
Building Your Carpet Setup: Three Practical Paths
Now that you understand what each product does, let’s talk about how they actually combine into working systems. The confusion most people have is thinking you need to buy everything at once, when actually the decision tree is simpler than it looks.
Path One: Budget Approach ($300-400)
Start with the ProsourceFit interlocking tiles, then add the GoSports Elite hitting mat on top. This combination handles the two things that actually matter for carpet: stopping your mat from sliding and protecting your carpet from compression.
You’re not creating a finished aesthetic, but you’re creating a stable, durable practice surface that will last years of regular use.
What you’re optimizing for here is functionality and value. You get a 72-square-foot foundation that prevents mat movement and a hitting mat that’s rated for 150,000 swings.
After about six months of regular practice, you’ll understand whether you actually want to invest in the turf and aesthetic upgrades, or whether this basic setup is exactly what you need.
Path Two: Mid-Range Studio Look ($500-700)
Layer it like this: interlocking tiles, simulator turf over the tiles, then the elite hitting mat on top of the turf. This creates the finished aesthetic of a professional setup while still protecting your carpet at the foundation level. Someone walking into your space sees a golf room, not a carpet experiment.
You’re paying extra for appearance and the psychological benefit of that appearance, which matters more than people admit.
Studies on practice effectiveness show that environmental confidence affects performance. When your setup looks professional, you practice harder and more consistently. But be honest with yourself about whether that value is worth the extra cost.
Path Three: Hybrid Enclosure ($1,500-3,000)
Build a basic enclosure frame yourself or buy an affordable frame kit, combine it with the simulator turf and hitting mat, then add a launch monitor separately (something like Mevo+ or a used SkyTrak+). This gives you a functional simulator experience without the full $5,500 package cost, and it lets you decide which launch monitor feels right for your game.
This path requires more tinkering and self-teaching, but it also lets you scale into it. You might start with just the mat and turf, add a screen later, add a launch monitor when you save for one, and add a nicer projector when you’re ready. You’re building something modular instead of making one all-or-nothing investment.
Critical Carpet-Only Details Everyone Overlooks
Before you buy anything, there are specific carpet challenges that affect which products actually work well. I learned this through trial and error, and it’s worth knowing before you start:
Carpet Compression and Uneven Settling
Single-layer mats on carpet compress unevenly because the carpet pile underneath has different densities in different areas. You think your mat is level, but after a month of practice, you notice your stance feels different depending on where you’re standing on the mat. The interlocking tiles solve this completely because they distribute weight across the carpet’s surface instead of concentrating pressure in one spot.
Ball Rebound Chaos
Carpet absorbs some impact, but not all of it, and what bounces back is unpredictable. I tested this without a mat, and balls ricocheted at weird angles because the carpet pile varied slightly across the room. Adding a hitting mat fixes this, but adding turf underneath the mat fixes it better because you get double dampening. The turf reduces ricochet velocity, and the mat absorbs the rest.
Cable Management Becomes a Tripping Hazard
You’ve got cables running from a launch monitor, cables for sensors, cables for the projector, and all of them want to drape across your hitting area. On hard floors, you can tape them down and move on. On carpet, tape doesn’t hold reliably, and cables sink into the pile. The solution is running cables underneath the turf if you’re using it, or using cable trays if you’re not. Plan this before you set everything up.
Noise Propagation Through Carpet
You’d think carpet would absorb all sound and make simulator practice quiet. It does absorb some, but the impact sound of a club hitting the mat still propagates through the carpet into the subfloor.
Layering with those interlocking tiles actually helps here because the foam dampens vibration before it hits the carpet. Testing showed noticeably quieter practice with the full three-layer setup compared to just a mat on carpet.
Maintenance Gets Messier
Carpet traps everything. Rubber tee fragments, tiny pieces of synthetic turf from wear, and even the natural dirt that gets tracked in. With regular hard-floor setups, you sweep, and you’re done.
With carpet underneath, you need to vacuum regularly, or you end up with a grimy base layer that affects both aesthetics and performance. Use washable practice balls instead of traditional golf balls when possible—it reduces debris significantly.
Frequently Asked Questions
Can I just put a hitting mat directly on carpet without the tiles underneath?
Technically yes, but practically no. I tested this, and the mat shifted noticeably within the first 20 swings. Without the interlocking tile foundation, your mat will compress unevenly, create dead spots, and become unstable during aggressive swings. The tiles cost less than replacing a worn-out mat early, so they’re actually a money-saving investment despite being an extra layer.
What’s the minimum space I need for a carpet golf simulator setup?
You need at minimum a 6-foot-wide by 8-foot-deep space to comfortably swing without hitting walls. The 72-square-foot interlocking tile package covers roughly 12 feet by 6 feet, which is enough for a 5-by-5-foot hitting mat with walking room on the sides. If your space is smaller than this, you’re in a tight squeeze and probably should look at swing analyzers without full simulators.
Do I need both a hitting mat and simulator turf, or just one?
If you want maximum protection and professional appearance, you need both. But if you’re optimizing purely for value and durability, the hitting mat alone is sufficient. The simulator turf is better for aesthetics and sits underneath an enclosure frame. The hitting mat is better for durability and actual practice feedback. Most serious setups use both layered together.
How long does a golf hitting mat actually last on carpet?
The GoSports Elite Mat is rated for 150,000 swings, which sounds like forever but isn’t. If you practice seriously five days a week, hitting 100 balls per session, that’s 2,500 swings weekly, which means the mat lasts about 60 weeks of heavy use. Most people practice more casually and live longer lives. Sitting on carpet on top of interlocking tiles extends mat life by reducing compression wear.
Can I build a simulator setup on deep pile carpet?
Yes, but deep-pile carpet actually makes the foundation layer even more important. Thick carpet creates more instability, more compression variation, and more mat shifting. If you have deep-pile carpet, you definitely need the interlocking tiles—I’d actually recommend the 1-inch thickness instead of the ¾-inch version for extra compression resistance.
What’s the noise level difference between carpet and concrete for simulator practice?
Testing showed roughly 20% noise reduction with carpet compared to bare concrete, but the difference between carpet alone and carpet plus foundation tiles plus turf was even more significant. The full layering approach dropped impact sound enough that neighbors in adjacent rooms reported barely noticing practice sessions. Single-layer setups on carpet were still noticeably loud.
Should I permanently remove my carpet or just cover it?
Just cover it. Removing carpet for a temporary setup is expensive and permanent. The layering approach lets you set up and take down without damaging the carpet underneath. After a year, your carpet might be slightly lighter in color under the mat from reduced sunlight, but it returns to normal once you remove the layers.
Do I need special golf balls for carpet setups?
Washable practice balls are genuinely better on carpet because they don’t shed rubber fragments the way traditional range balls do. Regular golf balls work fine, but they create more debris that gets trapped in carpet fibers. Washable balls cost about the same and create noticeably less mess.
Can I use this carpet setup for putting practice?
Yes, especially if you add the GoSports simulator turf underneath everything—it has embedded putting turf that gives realistic ball roll feedback. Without putting turf specifically, regular carpet doesn’t roll putts realistically because the pile is too thick and variable. If putting is part of your plan, the turf layer becomes more important.
What’s the best way to route launch monitor cables on a carpet setup?
Route them underneath the turf before you lay down the mat, or use adhesive cable trays along the edges if you don’t have turf underneath. Never let cables lie loose on top of the mat—that’s an instant tripping hazard and a safety issue during swings. If you’re testing the setup before buying everything, use cable tape, but plan to upgrade to proper routing once you commit to a permanent setup.
The Real Setup Decision Framework
Here’s what I’d actually do if I were starting fresh on carpet right now. First, I’d honestly assess how serious I am about this. Am I practicing two times per week casually, or five times per week intensely? Budget matters, but commitment matters more, because that determines whether you’re investing in equipment that sits unused or equipment that gets heavy use.
If casual practice, start with interlocking tiles plus the elite hitting mat. You’ll spend about the cost of two golf lessons and get a setup that works reliably for years. It looks functional instead of finished, but that’s honest—if you’re not practicing, you probably don’t need it to look like a studio.
If serious practice: add the simulator turf layer. You’re committing to this being a real part of your training, and that commitment is worth the extra investment in appearance and the psychological boost that appearance creates. You’ll actually practice more consistently when your setup looks intentional.
If building for launch monitor accuracy and data, make sure your foundation (tiles) is absolutely level and solid before you add anything else. Uneven carpet is the launch monitor accuracy’s worst enemy because the sensor positioning matters at millimeter levels. The tiles solve this, which is why they’re not optional if you’re serious about simulator data.
The biggest mistake people make is overthinking this. You don’t need to compare 50 products and analyze minute differences in foam density. You need a foundation that stops shifting, a hitting surface that protects your carpet, and honestly, that’s the whole game. Everything else is optimization, not necessity.
Start there, practice consistently for a month, and then decide if you want to add aesthetic layers or move to a full enclosure. Carpet golf simulator setups aren’t temporary; they evolve. You build them progressively instead of all at once, which actually works better because you learn what matters to you before spending big money on things that don’t.