
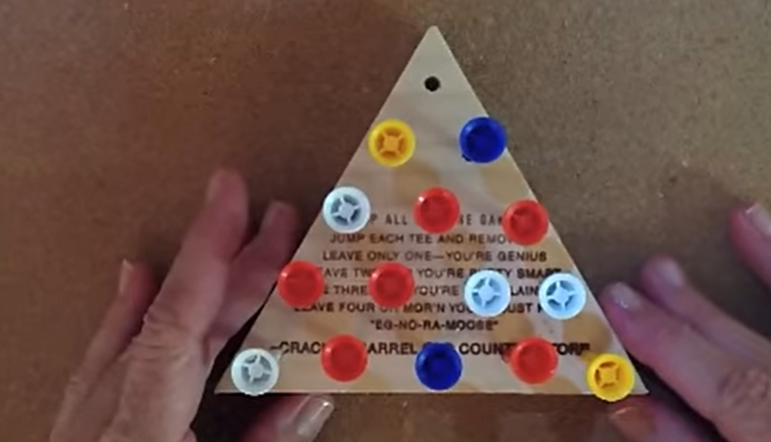
Yes, you can win the Cracker Barrel peg game. There are more than 6,000 different ways to finish with one peg left. The hard part is that two wrong moves in a row usually make a win impossible. The good news is that you do not need to memorize a long list of jumps. You only need to understand one simple shape: the empty diamond.
This guide gives you a clear, repeatable method. It explains how the board works, what the diamond looks like, and how to build it every time. You will also learn why starting with the middle hole is a trap and what to do when you make a mistake. By the end, you will be able to beat the game without help.
Can You Actually Win the Cracker Barrel Peg Game?
Many people think the game is mostly luck. It is not. It is a solved puzzle. The triangular version at Cracker Barrel has a known set of winning patterns. The trick is to follow a logical order instead of jumping randomly.
The official rating system makes it fun. If you leave one peg, you are a genius. Two pegs means you are pretty smart. Three pegs make you plain dumb. Four or more pegs earn you the title of egnoramoose. That is a silly word the restaurant made up to keep things light. The real challenge is that most beginners never see the pattern in the middle of the board. Once you see it, winning becomes simple.
How the Board Is Numbered
Before you can follow any solution, you need to know the layout. The board has 15 holes arranged in a triangle. The standard numbering goes from top to bottom, left to right.
Row 1: Hole 1 at the top point.
Row 2: Holes 2 and 3.
Row 3: Holes 4, 5, and 6.
Row 4: Holes 7, 8, 9, and 10.
Row 5: Holes 11, 12, 13, 14, and 15.
The game is also called the golf tee game because the wooden pegs look like golf tees. The official name is peg solitaire or Hi-Q. No matter what you call it, the board works the same way.
The Secret to Every Winning Strategy: The Empty Diamond
Every winning solution creates the same shape in the middle of the board. This shape is an empty diamond made of six holes. It includes holes 4, 5, 6, 7, 8, and 9. After the first few moves, these holes should be empty while the pegs around them remain in place.
The diamond gives you a clear path to clear the bottom rows. Without it, you will almost always get stuck with three or four isolated pegs that cannot jump each other. Beginners often skip this step. They jump too fast and ruin the shape. That is why most people end up with an egnoramoose rating.
Here is how you build the diamond.
One Complete Solution, Step by Step
Position the triangle with the point facing away from you. Leave hole 1 empty. This starting position is the only one that guarantees a win. Use the numbers above to follow each jump. The notation shows the peg that moves and the hole it lands in.
Phase 1: Clear the Top Triangle (Holes 1 to 6)
- Move peg 4 to hole 1.
- Move peg 6 to hole 4.
- Move peg 1 to hole 6.
After these three moves, you have an empty diamond in the center. Holes 4, 5, 6, 7, 8, and 9 are open. The top triangle is cleared.
Phase 2: Clear the Middle Row (Holes 7 to 10)
- Move peg 7 to hole 2.
- Move peg 13 to hole 4.
- Move peg 2 to hole 7.
- Move peg 10 to hole 8.
- Move peg 7 to hole 9.
Now the middle row is mostly empty. The board starts to look cleaner.
Phase 3: Clear the Bottom Rows (Holes 11 to 15)
- Move peg 15 to hole 13.
- Move peg 12 to hole 14.
- Move peg 6 to hole 13.
- Move peg 14 to hole 12.
- Move peg 11 to hole 13.
You finish with one peg left in hole 13. That is the center of the bottom row. Congratulations. You are a genius.
Alternative Method: The Boat Strategy
Cracker Barrel also teaches a method called the boat strategy. It uses the same empty diamond foundation but takes a different route to clear the bottom. Some people find it faster because it uses fewer moves at the end.
Start with hole 1 empty. Cover rows 4 and 5 with your hand so you only see the top triangle (holes 1 to 6). Clear the top triangle the same way as before.
Then move peg 7 to hole 2. Move peg 10 to hole 3. Move peg 13 to hole 4. Move peg 4 to hole 1. Now use the peg in hole 13 to jump three times in a row: 13 to 4, then 4 to 1, then 1 to 6. This clears most of the board quickly.
Finally, move peg 11 to hole 13, peg 14 to hole 12, peg 6 to hole 13, and peg 10 to hole 13. You end with one peg in hole 13.
This method requires more hand-eye coordination because the same peg jumps multiple times. But it is a good backup to know.
Why Starting with the Middle Hole Is a Trap?
Many people remove a peg from the center hole (hole 5) on their first try. This feels natural because the middle seems like a good place to start. It is not. Starting from the middle breaks the symmetry of the board. After three or four jumps, the remaining pegs scatter in a way that makes it almost impossible to create the diamond.
Mathematically, the corner start preserves balance. The board has a natural axis of symmetry down the center. Leaving hole 1 empty keeps that axis intact. If you start from hole 5, the pegs on the edges have no way to jump inward. You will almost always end with three or four pegs that cannot move.
If you are playing with friends and someone else starts from the middle, you can catch up by removing the top corner peg (hole 1) at the start. That works as well.
Common Mistakes and How to Recover
Even with a good plan, mistakes happen. Here are three common errors and how to fix them.
Mistake 1: Jumping into a corner too early.
If a peg lands in hole 3 or hole 15 early in the game, it gets stuck. You cannot jump out of a corner unless another peg is next to it. To avoid this, keep the corners filled until the bottom rows are almost empty. If you have already jumped into a corner, look for a jump that brings the peg back toward the center.
Mistake 2: Leaving pegs on the edges without a way to jump them back in.
This happens when you clear the center too fast. The diamond shape prevents this. If you already have isolated pegs on the edges, stop and look for any jump that lands on the empty diamond holes. That will open the board again.
Mistake 3: Forgetting to create the diamond before moving to the bottom rows.
This is the most common mistake. Beginners jump pegs in the bottom rows too early. They get three pegs left and cannot move. The recovery tip is simple: if you have 3 or 4 pegs left and no jumps, look for any jump that opens the center again. Sometimes you can reset the diamond by removing a single peg from the top.
Frequently Asked Questions
What does egnoramoose mean?
It is a nonsense word Cracker Barrel uses for leaving four or more pegs. It sounds like an ignoramus. The rating is meant to be funny, not insulting.
Can I play the peg game online?
Yes. Cracker Barrel has a free app on iOS and Android that includes the peg game. Several websites also offer digital versions that let you practice without a physical board.
Is the golf tee game the same as peg solitaire?
Yes. The golf tee game is a nickname because the pegs look like golf tees. The official name is peg solitaire or Hi-Q. The triangular version at Cracker Barrel uses 15 holes.
What is the best starting position?
Always leave the top corner (hole 1) empty. If your board has a different arrow or orientation, rotate it so the point faces away from you, and that hole is open.
How long does it take to learn?
Most people can memorize one winning sequence in 10 to 15 minutes of practice. Once you understand the empty diamond, you can improvise your own solutions without memorization.
Final Word
The next time you sit down at Cracker Barrel, you already know the secret, build the empty diamond, start from hole 1, and trust the pattern. Learning how to beat the golf tee game at Cracker Barrel takes maybe 15 minutes of practice, but the satisfaction of leaving just one peg? That lasts the whole meal. Give it a try before your food even arrives.