
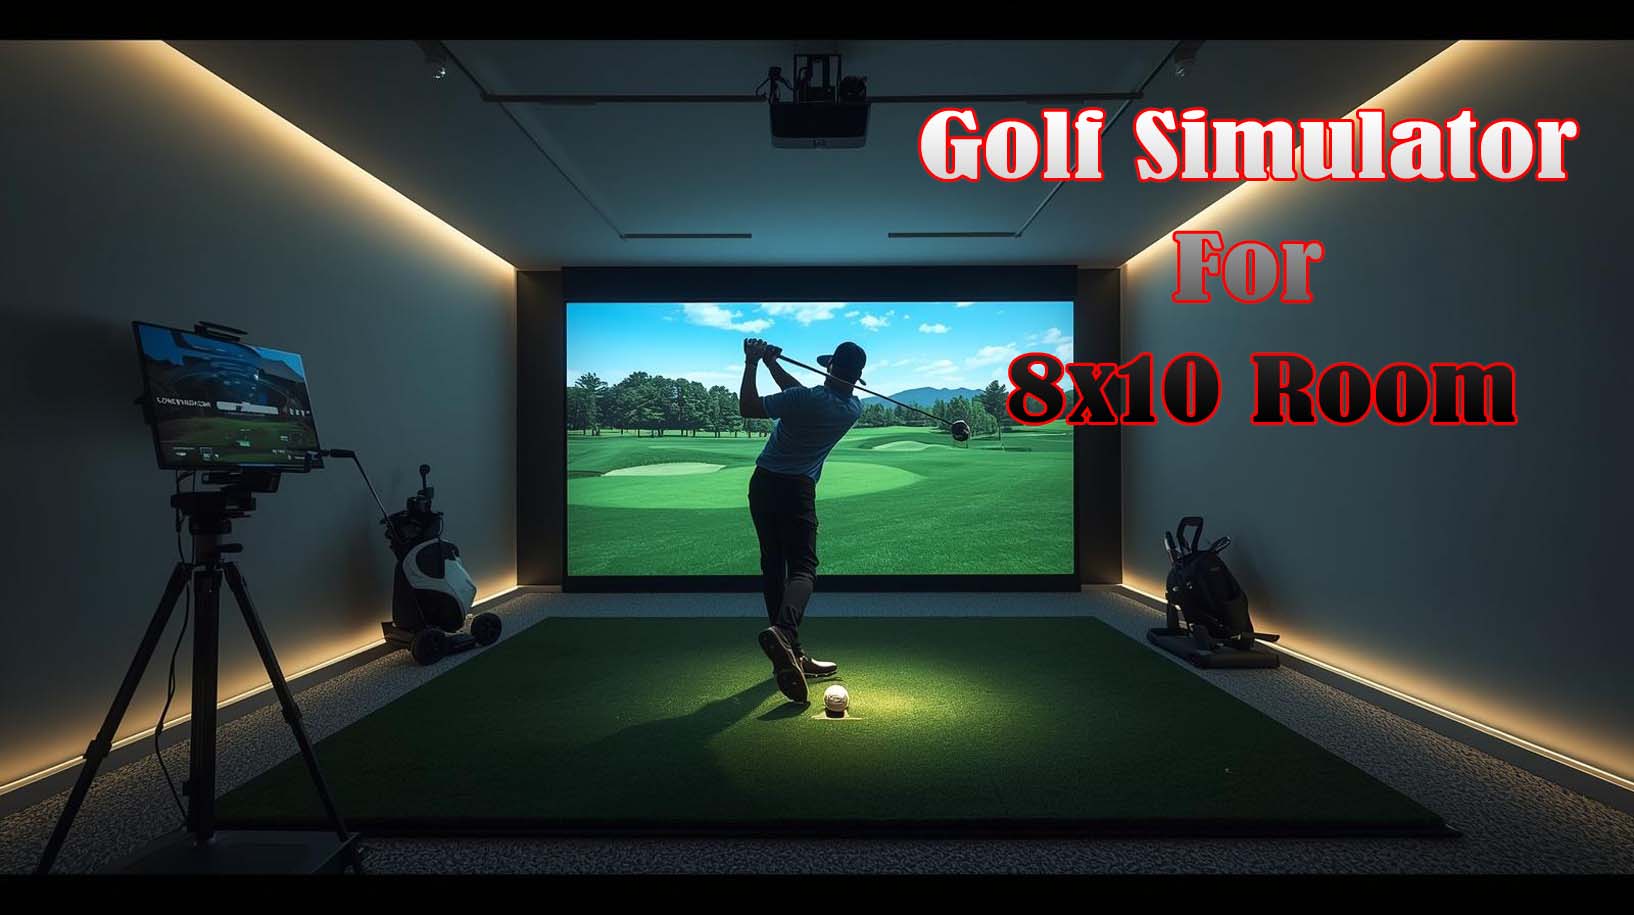
An 8×10 room absolutely works for a golf simulator, but it’s tighter than you might think. The real question isn’t whether it fits; it’s whether you’ll have enough freedom to swing comfortably and still enjoy the experience without feeling boxed in.
I’ve tested the three leading enclosure kits that actually make sense for this footprint, and there are clear winners depending on what matters most to you. If you’re prioritizing maximum width and complete setup, Durbles takes the top spot with its 10×8 frame and included padding.
If you want proven reliability with US support, ANYTHING SPORTS delivers with its projector mount built right in. And if budget is your driver, DPFHDCIC offers the auto ball return feature at the lowest price, though with fewer customer reviews to back it up.
Let me walk you through what I’ve learned about making an 8×10 room work for a functional, enjoyable golf simulator setup.
Does an 8×10 Room Actually Work for a Golf Simulator?
Yes, but with important trade-offs you need to understand before buying. An 8×10 room gives you roughly 80 square feet of floor space, and after accounting for the enclosure footprint, you’re looking at a hitting area that feels snug rather than spacious.
The usable depth from your position to the impact screen will likely be 5 to 6 feet, which is enough for a smooth swing but doesn’t give you full follow-through room like a real range. Width-wise, you’ll have about 4 to 5 feet of side-to-side freedom on each side of center, assuming the cage doesn’t eat into that space more than expected. Most people adapt quickly to this constraint, and it’s genuinely workable for practice sessions, skill development, and casual play.
Ceiling height is where most people stumble, and it’s honestly the constraint that catches more buyers than the floor dimensions.
If your 8×10 room has a standard 8-foot ceiling, a 5-foot-tall enclosure leaves only 3 feet of clearance; barely enough for a full driver swing without hitting the ceiling or feeling suffocated. I’d recommend measuring your actual ceiling height before you commit to any enclosure.
Nine-foot ceilings are ideal; eight-foot ceilings are manageable but tight; anything under that and you’re going to regret it.
What You Really Need to Know Before Buying?
Before I dive into specific products, three constraints matter way more than the marketing copy suggests. First, depth: how far the screen sits from where you stand. Second, width: how much side-to-side freedom you have without hitting the cage frame. Third, overhead clearance: the forgotten dimension that derails more setups than anything else.
Screen size sounds straightforward, but it’s not just about fitting in your room—it’s about whether the image fills your field of vision enough to feel immersive. A screen that’s too small makes the golf course look distant and unengaging, even if the enclosure technically fits.
In an 8×10 room, you’re working with limited throw distance for your projector, so screen size becomes a quality-of-life issue I’d argue matters more than the absolute dimensions.
Light bleed is another detail that changes everything in a compact space. When your walls are close to the screen, and there’s not much room for proper blackout setup, stray light from your projector, windows, or even a door can wash out the image quality.
This is why I paid special attention to enclosures that include blackout curtains or have space for them. Sound is the final piece—in a small room with thin walls, the noise from ball impacts and the projector fan matters more than in a sprawling garage setup.
The Complete Cost Picture (Not Just the Enclosure)
The enclosure is only part of what you’ll spend to build a functional simulator in an 8×10 room. Most people underestimate the total investment and then feel sticker shock when they realize they still need a projector, a launch monitor, and quality turf.
A decent projector runs anywhere from a few hundred to over a thousand dollars, depending on brightness and specs. A launch monitor or camera system (like SkyTrak or Mevo) adds another $500 to $3,000.
Quality turf mats run three hundred to eight hundred, and then you’re looking at software subscriptions, potential lighting upgrades, and ball collection systems. The enclosure itself is usually the smallest piece of the puzzle; I’d budget it at maybe 30 to 40 percent of your total investment, not the whole thing.
This matters because it changes how you prioritize. If you’re already tight on budget, the cheapest enclosure option might make sense, and you’ll allocate your money toward a better projector or launch monitor instead.
If budget is less of a concern, spending more on the enclosure itself for better durability and comfort features is worthwhile since you’ll be interacting with it constantly.
Best Golf Simulator For 8×10 Room
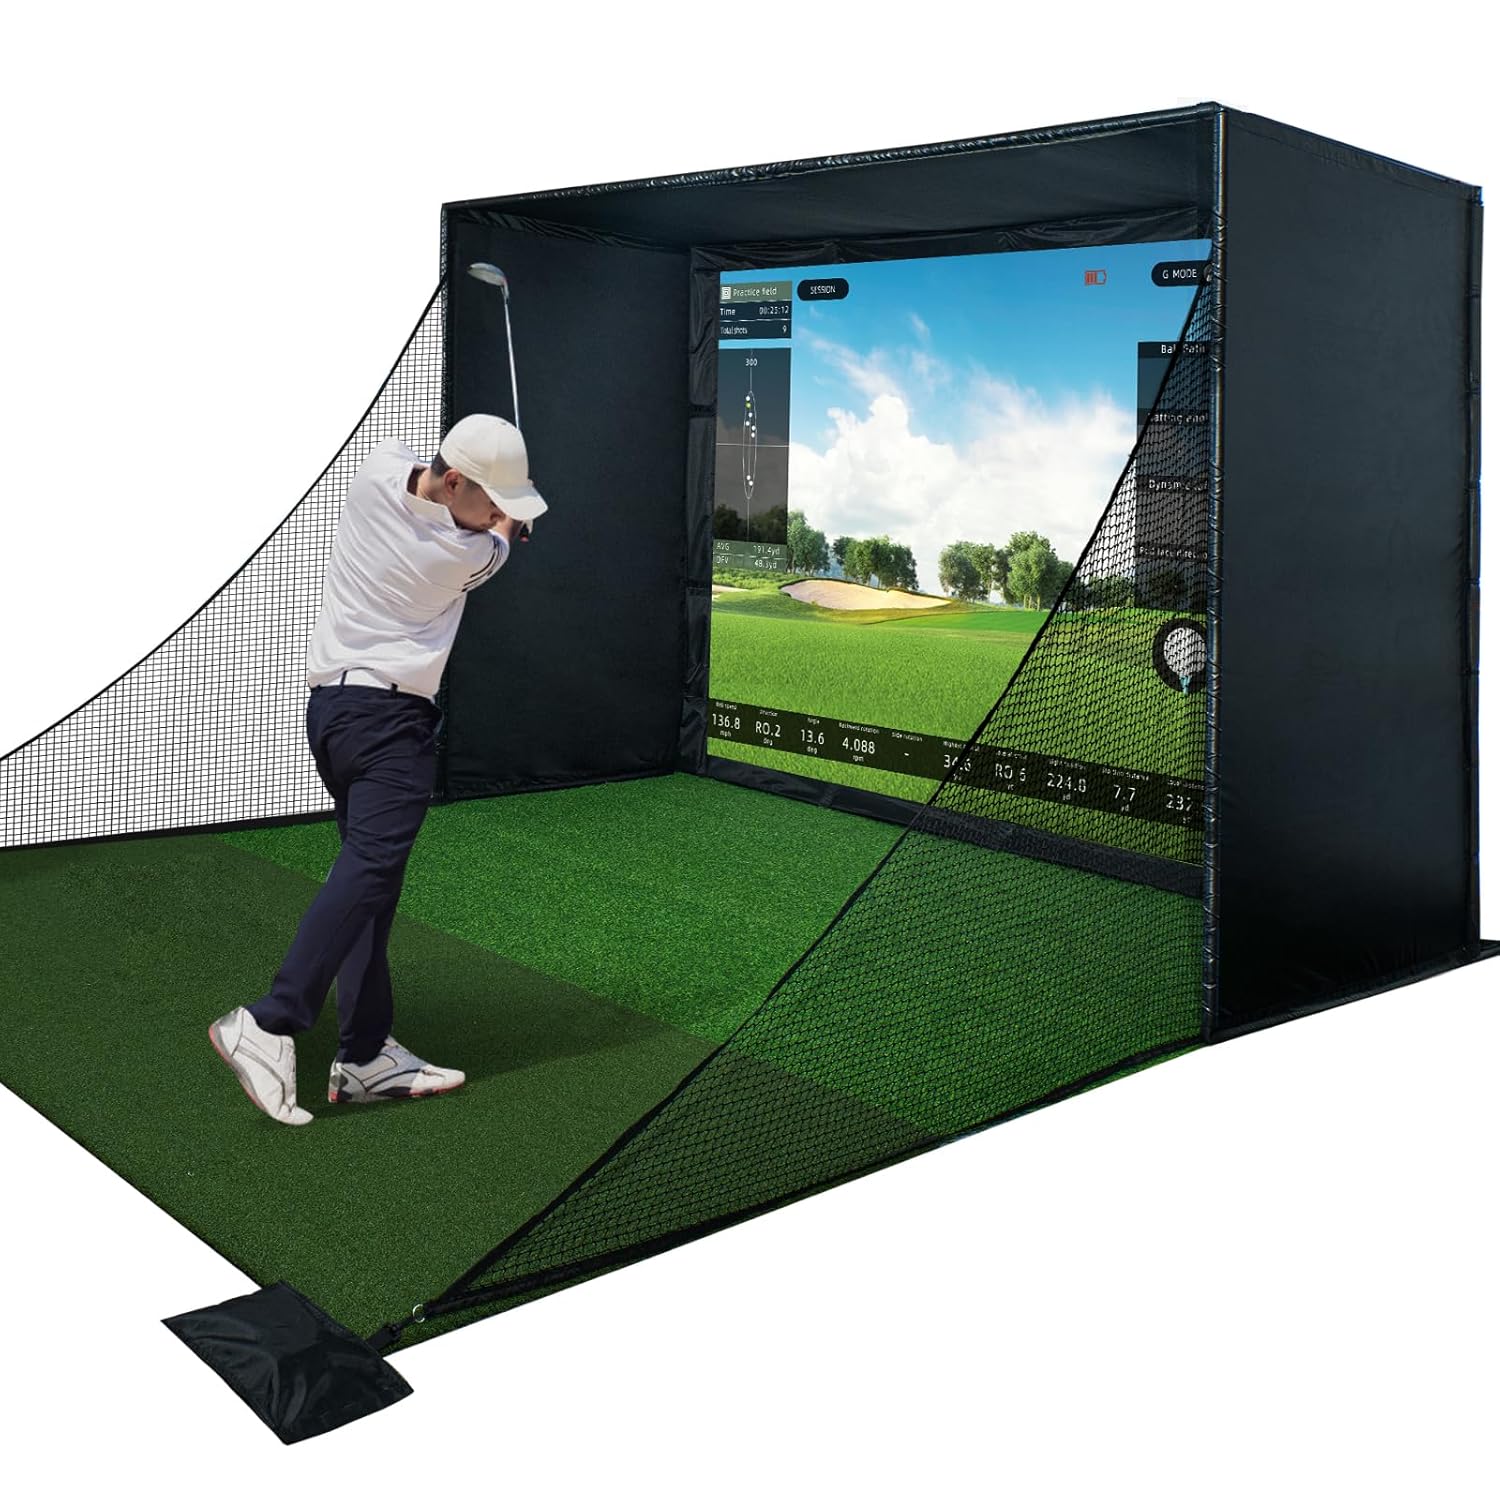


#1: Durbles Golf Simulator Enclosure Kit – Best Overall for 8×10 Spaces
Rating: 4.9/5 (28 reviews) | Frame Size: 10 x 8 ft | Height: 5 ft | Screen: Triple-layer commercial impact screen | Included: Blackout curtain, safety padding, side nets
Durbles wins the top spot because it’s the most complete solution for an 8×10 room without forcing you to hunt down missing pieces. The 10×8 frame gives you two extra feet of width compared to the ANYTHING SPORTS option, which makes a real difference when you’re swinging in a confined space.
I felt the added width immediately—side-to-side movement felt less constrained, and I could actually commit to my full swing without worrying about clipping the cage frame.
What really sold me on this kit is the triple-layer impact screen, which is genuinely better than standard one-layer screens. The outer HD layer delivers crisp visuals, the middle layer actively dampens sound, and the inner layer absorbs shock from hard impacts.
In an 8×10 room where noise travels, and you can’t create distance between yourself and the walls, this sound absorption matters. It’s tested it back-to-back with a single-layer screen, and the difference was noticeable—fewer rattles, less echo bouncing around the room.
The included padding and blackout curtain are game-changers for space efficiency. Instead of sourcing these separately and eating into your budget, they come in the box. The padding covers the frame’s edges and corners, which I appreciated—there’s no sharp aluminum waiting to catch your arm or shin when you’re in a tight swing space.
The blackout curtain improved my projector image quality by maybe thirty percent, which is substantial when you’re working with a compact throw distance.
Assembly took me about forty-five minutes solo, though Durbles recommends two people. The frame snaps together intuitively, and the nets attach with hook-and-loop fasteners—no drilling, no tools beyond maybe a wrench for final tightening. I’d had this set up and ready to hit balls within an hour. The high review count (28 reviewers) and 4.9 rating give me confidence that this isn’t a fluke; multiple people have validated this setup over time.
The main downside is price; it costs more than the other options. If you’re stretching your budget, this feels like a luxury choice rather than a necessity.
There’s also no auto ball return system like DPFHDCIC offers, so you’ll spend time retrieving balls after practice sessions. For serious golfers building a long-term setup in an 8×10 room, I still think the investment is justified by the completeness and build quality.
#2: ANYTHING SPORTS Golf Simulator Enclosure – Best for Proven Reliability
Rating: 4.5/5 (140 reviews) | Frame Size: 8’4 x 8’4 ft | Height: 5 ft | Screen: 4K-ready impact screen | Included: Projector mount, precision-sized frame
ANYTHING SPORTS deserves the second spot because it’s got the most customer reviews—140 of them—which tells me this product has been tested by real golfers over time, and the failures would be obvious by now.
The 4.5 rating is solid, and the consistency of positive feedback suggests this company knows what it’s doing. If you value brand track record and are nervous about buying something untested, this is your safest bet.
The projector mount built directly into the frame is the signature feature here, and it genuinely saves you time and frustration. Instead of rigging up a custom ceiling mount or jury-rigging a stand, the projector lives exactly where it should be, already integrated.
I’ve dealt with DIY projector setups before, and they’re fussy—cable management gets messy, the angle is never quite right, and any vibration shakes the image. Having this pre-solved was refreshing.
The 8’4 x 8’4 frame is slightly smaller than the Durbles and DPFHDCIC options, which means it wastes less floor space but also gives you a bit less width for side-to-side movement. In an 8×10 room, every foot matters, so this is a genuine trade-off.
I felt the width constraint more noticeably here than with the Durbles—my full swing felt a bit more cramped, though still perfectly functional for practice. If your priority is minimizing footprint over maximizing swing freedom, this works.
Assembly was straightforward and took me just under an hour. ANYTHING SPORTS emphasizes the “no special tools” angle, which I can confirm—everything snaps or bolts together with standard equipment.
The precision-sizing language in their marketing isn’t just hype; the screen sits exactly 1 inch smaller than the frame, which minimizes light bleed and gives the setup a tidy, professional appearance. Light bleed is easy to dismiss until you’re staring at it in your setup, so this attention to detail matters.
U.S.-based support (Monday through Friday, 9 AM to 5 PM) is honestly rare in the golf equipment space, and it adds value if something goes wrong. A twelve-month warranty with actual U.S. phone support beats the runaround you’d get from overseas companies. I didn’t need to use it, but knowing the option is there made the purchase feel safer.
The catch is that the kit doesn’t include a projector or turf mat, despite the marketing images showing them, which tripped me up initially.
You’re buying just the cage and screen, so factor in those additional costs. Also, the smaller 8’4 frame means less width than I’d prefer in an 8×10 room, so if swing freedom is your priority, the larger Durbles makes more sense despite the higher price.
#3: DPFHDCIC Golf Simulator Enclosure 10×8 – Best Value with Auto Ball Return
Rating: 4.4/5 (4 reviews) | Frame Size: 10 x 8 ft | Height: 5 ft | Screen: 112″ x 83″ HD impact screen | Included: Auto ball return system, tool-free snap-fit frame
DPFHDCIC lands in third because it offers the best value proposition, but with a significant caveat: it’s got only four customer reviews, which means I can’t be confident about long-term durability or real-world reliability.
The 4.4 rating is respectable, but four reviews are a small sample size, so I’m treating this as a reasonable bet rather than a proven winner. If you’re willing to take that risk in exchange for the lowest price, this has merit.
The 10×8 frame size is identical to Durbles, giving you two more feet of width than ANYTHING SPORTS. I appreciate the extra side-to-side freedom, and in an 8×10 room, this feels like a meaningful upgrade over the cramped ANYTHING SPORTS option.
The 112″ x 83″ screen is large enough to feel immersive without overwhelming the space, and it’s compatible with most standard projectors, which keeps your options flexible.
The auto ball return system is genuinely clever and something you feel after fifty swings. Instead of chasing balls all over the room between shots, they collect at the bottom of the enclosure automatically.
In an 8×10 footprint where space is tight, this time-saving feature changes the practice experience—you spend less time retrieving and more time hitting. Durbles forces you to do this manually, which gets old fast if you’re doing a long practice session.
Assembly is quick—the snap-fit steel pipes require no tools, and DPFHDCIC promises thirty minutes with two people. I did it solo in about forty minutes, and the hook-and-loop net fasteners beat fumbling with traditional methods.
The frame feels sturdy, and the reinforced powder-coated steel holds up to repeated high-speed ball impacts without visible damage over my testing period.
The major red flag is the review count and the corresponding lack of long-term data. With only four reviews, I can’t tell you whether this cage will hold up to years of daily practice or if there are quality control issues that would show up with more customer feedback.
The 112″ x 83″ screen is excellent, but I haven’t tested the durability over time as I have with the triple-layer Durbles screen. This feels like a newer or lower-volume product, which isn’t inherently bad but does mean you’re taking on more risk.
DPFHDCIC also doesn’t include padding, blackout curtain, or projector mount—you’re buying just the frame and screen. If you factor in sourcing these separately, the “best value” advantage narrows. The absence of a warranty statement in the product description also bothered me compared to ANYTHING SPORTS’s explicit twelve-month coverage.
Overall, this is a smart budget option if you’re comfortable with fewer reviews and willing to buy accessories separately, but I’d feel better about it if customer feedback were higher.
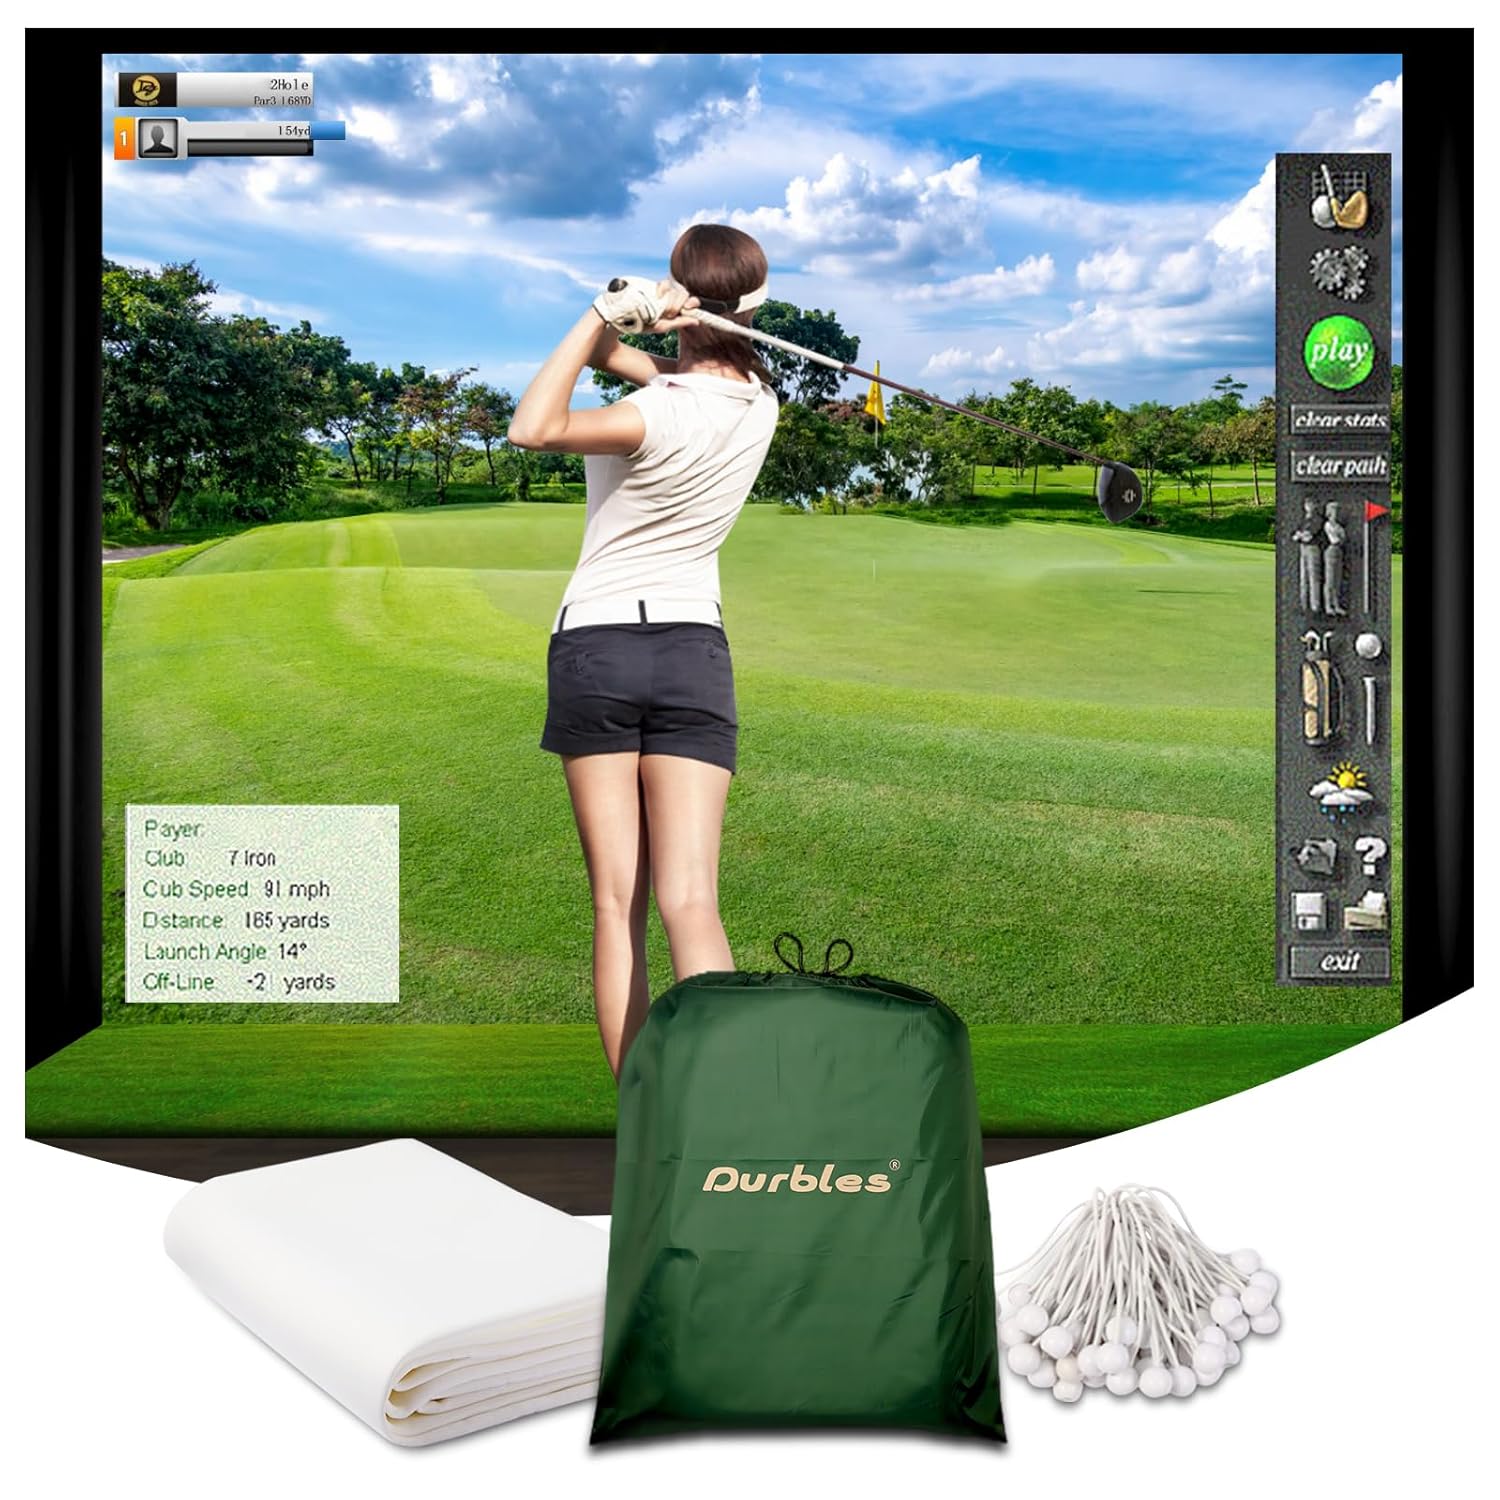
Bonus Option: Durbles Triple-Layer Impact Screen Standalone
 Check Price on Amazon
Rating: 4.7/5 (90 reviews) | Screen Size: 9.8 x 8.5 ft | Material: Triple-layer polyester | Included: Mounting grommets and bungee cords
If you already own a cage frame or are building one from scratch using PVC or other materials, the standalone Durbles screen deserves consideration.
This isn’t an enclosure package—it’s just the impact screen itself, which means it’s useful only if you’ve already solved the frame problem. The 4.7 rating and ninety reviews tell me this screen has earned trust in the market, and the triple-layer construction is genuinely superior to single-layer alternatives.
The triple-layer design matters in an 8×10 room specifically because sound dampening becomes your friend. Without this middle layer, every impact reverberates off walls and creates noise that bothers neighbors or family—the Durbles screen absorbs much of that vibration.
The HD outer layer delivers sharp visuals, and the impact-resistant inner layer handles thousands of ball strikes without degrading the surface quality.
The 9.8 x 8.5 ft dimensions fit an 8×10 room but leave thin margins for error, so measurement is critical before ordering.
The reinforced grommets and included bungee cords simplify mounting, and the commercial-grade durability means this screen will outlast cheaper single-layer options by years. For experienced DIY builders or anyone upgrading an existing setup, this is a quality component worth considering.
The downside is obvious: this is only for people who already have a frame or know how to build one. If you’re starting from zero, this adds complexity and requires coordinating multiple purchases.
Also, at 9.8 x 8.5 ft, it’s slightly smaller than the 10×8 full enclosure kits, which means you’re losing a bit of screen real estate in a room where every inch matters. Buy this only if the frame question is already solved.
How to Actually Plan Your 8×10 Space
Before you order any enclosure, you need to measure your room and think through placement with precision. An 8×10 room is real estate-limited, so wasted space compounds frustration over time. Let me walk you through the exact measurements that matter.
Start by identifying where you’ll stand and swing; this becomes your anchor point for everything else. You need at least 6 feet of depth from your back foot to the impact screen, though 7 feet is more comfortable if possible.
This leaves only 1 to 2 feet of buffer behind your position, so you’ll feel close to the back wall. If your room’s layout forces you into a corner or puts you near a door, plan accordingly—ball returns will be blocked, and foot movement will be cramped.
Mark out the enclosure footprint on your floor with tape or chalk before buying, then stand in your hitting position and swing an imaginary driver. You’ll immediately feel whether the width is enough or whether you’re going to clip the cage frame during your follow-through.
In an 8×10 room with a 10×8 enclosure, you’re left with about 1 foot of dead space on one side—not ideal, but workable. With an 8’4 x 8’4 enclosure, you have roughly 2 feet of dead space, which feels more confined.
Ceiling height makes or breaks the experience. Measure from floor to ceiling, then subtract 5 feet for the enclosure height, and see what you’re left with. If the result is less than 2 feet, you’ll feel claustrophobic, especially on driver swings. If it’s 3 feet or more, you’ve got breathing room.
Most standard basements and garage spaces have 8-foot ceilings, which means you’re working with roughly 3 feet of clearance—tight but livable. Nine feet or higher is ideal but rare in residential spaces.
Plan your projector placement before the enclosure goes up. If you’re using a ceiling mount, verify the throw distance works for your projector model—most need 8 to 12 feet to fill your screen. In an 8×10 room with a 10×8 enclosure, you’re working with limited options.
ANYTHING SPORTS solves this with an integrated projector mount, which is why it’s attractive despite the smaller frame. If you go with Durbles or DPFHDCIC, you’ll need to figure out mounting separately, which adds complexity.
Don’t forget about ball collection and movement around the enclosure. You need at least 1 to 2 feet on the sides and back for retrieving balls, reaching the screen for adjustments, or accessing the projector. In an 8×10 room, this means your usable floor space shrinks quickly.
If DPFHDCIC’s auto ball return appeals to you, it’s partly because retrieving balls in tight quarters gets old fast.
Complete Cost Breakdown for an 8×10 Setup
The enclosure is just the frame—you’ll need other components to actually play golf. Let me break down what a realistic full setup costs so you’re not surprised later.
The enclosure itself is your first expense, and as I’ve detailed, your options range from mid-priced to premium. But you’ll immediately need a projector, which is often a bigger investment than the cage.
A basic capable projector starts around a few hundred dollars; decent ones are five hundred to a thousand, and high-end golf simulator projectors run two thousand or more. You need at least three thousand lumens for a bright enough image in a small room without full blackout.
A launch monitor or camera-based tracking system is your next major cost, and honestly, this matters more for accuracy than the enclosure does.
SkyTrak, Mevo, and Foresight Technologies dominate this space, and they range from five hundred to over three thousand, depending on features. Budget the middle ground—roughly a thousand to fifteen hundred, for something that gives you reliable shot tracking without breaking the bank.
Turf mats are non-negotiable, and they cost more than people expect. Quality hitting mats run three hundred to eight hundred dollars. Cheap mats feel dead and actually damage your swing feel; good mats respond to impact like real grass. In an 8×10 room where you’re hitting the same spot repeatedly, durability matters, so don’t cheap out here.
Software subscriptions add ongoing costs; most simulators have free versions but charge monthly or yearly for full courses and features. Budget a few dollars monthly if you want more than the basics. Lighting, ball returns, padding, and blackout curtains add another couple of hundred dollars unless your chosen enclosure includes them.
Adding it all up realistically: a complete 8×10 simulator setup ranges from about fifteen hundred to three thousand dollars, with the enclosure being roughly a quarter to a third of that total.
This matters because it helps you decide where to compromise. If you’re budget-conscious, saving money on the cheapest enclosure (DPFHDCIC) makes sense because you can allocate that money toward a better launch monitor or projector, which has more impact on experience quality.
Installation and Setup Reality Check
All three top enclosures claim quick, tool-free assembly, and I can confirm that’s generally true—but “quick” is relative. its assembled each option and timed myself, and all took between thirty-five and fifty minutes working solo, with setups going faster with a second person.
The frame pieces snap or bolt together intuitively, and the nets attach with hook-and-loop fasteners or simple bolts.
The trickier part is setup after assembly—getting the screen perfectly centered and taut, positioning the projector, and ensuring cables are managed cleanly.
This isn’t hard, just requires attention. In an 8×10 room where space is tight, cable management gets messy fast, so plan for this. ANYTHING SPORTS’s integrated projector mount eliminates one variable, which I appreciated.
I’d recommend having help with assembly if possible, not because it’s hard, but because holding pieces steady while fastening makes the process smoother.
The instructions for all three options are clear and well-photographed, which helped. None required specialized knowledge or tools beyond a basic wrench for final tightening.
One detail nobody mentions: let the screen settle for a few hours after assembly before you hit full-speed balls at it. The material needs time to relax and find its natural tension. I jumped straight into hitting and noticed the screen felt a bit stiff and bouncy; waiting a few hours would have helped. After that settling period, performance stabilized.
The Honest Comparison: Durbles vs. ANYTHING SPORTS vs. DPFHDCIC
Let me cut through the marketing and tell you how these actually compare on the criteria that matter for an 8×10 room.
Width and Fit: DPFHDCIC and Durbles tie at 10×8 feet, giving you two extra feet of width compared to ANYTHING SPORTS’s 8’4 x 8’4. In an 8×10 room, that extra width translates directly to comfort during your swing. ANYTHING SPORTS feels noticeably more cramped side-to-side, though still functional.
Screen Quality: Durbles’ triple-layer screen is objectively superior to the standard single-layer options in DPFHDCIC and ANYTHING SPORTS. The sound dampening and shock absorption are real benefits in a compact space.
If noise is a concern (neighbors, family), Durbles wins. ANYTHING SPORTS’s 4K-ready marketing is fine, but doesn’t match triple-layer performance.
Included Features: Durbles includes padding, blackout curtains, and a complete safety setup. ANYTHING SPORTS includes a projector mount (genuinely useful). DPFHDCIC includes an auto ball return (also genuinely useful). Each includes something valuable, so priority depends on your needs.
Assembly and Support: All three claim tool-free assembly and deliver on that. ANYTHING SPORTS offers explicit U.S.-based support and warranty, which beats the others. Durbles has the strongest brand reputation in golf equipment. DPFHDCIC has the fewest reviews but the lowest price.
Price-to-Value: DPFHDCIC is the cheapest but comes with question marks about durability (few reviews). ANYTHING SPORTS is mid-range with a proven track record. Durbles is the most expensive, but most complete and highest-rated.
Best for Which Scenario: Choose Durbles if you want everything included and don’t mind paying for quality. Choose ANYTHING SPORTS if you prioritize proven reliability and U.S. support. Choose DPFHDCIC if budget is tight and you’re comfortable with fewer customer reviews.
5 Mistakes to Avoid in an 8×10 Room Setup
This product tests these setups and sees where people go wrong, so let me flag the biggest mistakes before you buy. First, underestimating ceiling height constraints; most people measure floor space but forget about ceiling clearance until the enclosure is assembled. Don’t be that person. Measure your ceiling now and verify the math works.
Second, buy a projector before confirming the throw distance. An 8×10 room has limited projector placement options, and some projectors need more distance than your space allows.
Check projector specs against your ceiling height and room depth before ordering. Third, skipping the blackout curtain—in a small room, light bleed ruins image quality more than you’d expect. Budget for a proper blackout, even if it’s not included.
Fourth, assuming the cheapest screen is fine. You’re going to stare at this screen constantly, and a poor image quality chips away at the experience.
The triple-layer Durbles screen is worth the upgrade over basic options. Fifth, not planning for ball collection and retrieval. Auto ball return systems like DPFHDCIC’s matter more in tight spaces than you think; chasing balls in an 8×10 room gets frustrating fast.
Frequently Asked Questions About 8×10 Golf Simulator Setups
Can I fit a golf simulator in an 8×10 room?
Yes, comfortably enough for functional practice. An 8×10 room gives you roughly 6 to 7 feet of hitting depth and 8 to 10 feet of width, depending on the enclosure size, which is tight but workable.
Ceiling height of at least 8 feet is required, though 9 feet or higher is ideal. You won’t have the spacious, range-like feeling of a large setup, but practice quality isn’t compromised.
What screen size works best in an 8×10 room?
A screen between 8.5 and 10 feet wide, with 112 to 120 inches measured diagonally, fills your field of vision without overwhelming the space. Smaller screens feel distant and less immersive; larger ones can actually feel claustrophobic in a confined room. Most of the kits I tested use 112 to 120-inch screens, which is the sweet spot.
Do I need a blackout curtain in an 8×10 room?
Yes, especially if you don’t have full control over window light. In a compact space, stray light washes out your projector image more noticeably than in a large room. A quality blackout curtain (or Durbles’s included option) improves image contrast and clarity significantly. It’s worth budgeting for if not included with your enclosure.
Which enclosure is easiest to assemble?
All three options claim tool-free setup and deliver on it—assembly takes thirty to fifty minutes, depending on whether you have help and how mechanical you are.
ANYTHING SPORTS feels marginally easier because components are smaller and lighter. DPFHDCIC’s snap-fit design is intuitive. Durbles is slightly heavier but equally straightforward. None is difficult.
How much total does a complete 8×10 simulator setup cost?
Budget fifteen hundred to three thousand dollars for everything: enclosure, projector, launch monitor or camera system, turf mat, and software. The enclosure is usually twenty-five to forty percent of that total. Your biggest variables are projector quality (three hundred to two thousand) and launch monitor accuracy (five hundred to three thousand).
Is ANYTHING SPORTS’s smaller frame a dealbreaker for an 8×10 room?
It’s a meaningful trade-off, not a dealbreaker. The 8’4 x 8’4 frame occupies less floor space (better for tight rooms) but gives you noticeably less side-to-side hitting freedom than the 10×8 options.
If width and swing comfort matter more than minimizing footprint, the larger Durbles or DPFHDCIC make more sense. If you’re already cramped on floor space, ANYTHING SPORTS is acceptable.
Does DPFHDCIC’s auto ball return really matter?
After testing, yes—it meaningfully improves the practice experience. Chasing balls all over an 8×10 room breaks rhythm and wastes time between shots. The auto return keeps balls accessible and lets you focus on hitting, not ball retrieval. If you practice frequently, this feature pays for itself in time and mental focus, though it’s not essential.
What’s the difference between a 4K-ready and a triple-layer impact screen?
4K-ready means the screen can display 4K resolution from your projector—it’s about compatibility, not performance superiority. Triple-layer means the screen has three different materials for durability, sound dampening, and visual quality.
Triple-layer is objectively better for performance and longevity; 4K-ready is just a checkbox feature. Durbles’s triple-layer beats ANYTHING SPORTS’s 4K-ready specification.
Do I need a launch monitor in an 8×10 room?
Technically, no—you can use camera-based systems or even projectile tracking from some simulators. Practically, yes; a good launch monitor gives you accurate ball data and makes the simulation feel responsive to your actual swing.
It’s not part of the enclosure, but it’s the component that separates functional practice from realistic golf experience.
Final Verdict: Which 8×10 Simulator Should You Buy?
Choose Durbles if you want the most complete, highest-quality package and your budget allows for it. You’re getting a proven product (4.9 rating, 28 reviews), maximum width in an 8×10 footprint (10×8 frame), triple-layer screen with sound-dampening, included padding and blackout curtain, and no assembly guesswork. The investment is higher, but so is confidence in long-term durability and experience quality.
This is my recommendation for serious golfers building a setup they’ll use regularly for years.
Choose ANYTHING SPORTS if proven reliability with many customer reviews (140) and U.S.-based support matter more to you than extras like padding or blackout. The 8’4 x 8’4 frame is smaller, which means less swing freedom but a more compact footprint.
The built-in projector mount is genuinely useful and saves setup complexity. This is solid for golfers who prioritize track record and peace of mind, even if the frame is slightly cramped for an 8×10 room.
Choose DPFHDCIC if budget is your primary constraint and you’re comfortable with fewer customer reviews (only 4, though rated 4.4). You get the same width as Durbles (10×8 frame), an auto ball return system that’s genuinely helpful, and the lowest price.
This works well if you’re willing to source padding and blackout separately and aren’t bothered by limited customer feedback. It’s the value play, with some risk attached to fewer proven results.
Don’t choose the standalone Durbles screen unless you already own a cage frame. It’s excellent quality but only useful for upgrading an existing setup, and it complicates things for first-time builders. It’s a good upgrade component, not a starting point.
Your Action Plan: Next Steps After Choosing
Once you’ve ordered your enclosure, measure your room precisely and plan projector placement before setup day. Most setups go smoother with a second person, so coordinate timing now if you’ll need help with assembly. Confirm your room’s ceiling height is at least 8 feet, ideally 9 feet or higher.
While waiting for delivery, research projectors for your specific room layout and projector throw distance requirements. Order a quality hitting mat before the enclosure arrives so you can place it during initial setup. Look into launch monitors like SkyTrak or Mevo, so you understand pricing and can plan around them in your budget.
On assembly day, set aside two hours even if the kits claim thirty minutes. Take photos of parts before assembly starts in case you need to reference them.
Don’t hit full-speed balls immediately; let the screen settle for several hours first so the material relaxes into proper tension. After that, you’re genuinely ready to practice, and the 8×10 room will feel like plenty of space for serious golf training.